This guide explains how to activate the Cloud Security Module on the Hoplon Platform. It is designed to help you enhance the security of your cloud environment by setting up a secure connection between your Google Cloud account and the Hoplon Platform. Step-by-Step guidance.
Before you begin, make sure you have the following:
Google Workspace Super Admin Account
You must be signed in as a Super Admin in Google Workspace.
Learn more about Super Admin roles here:
Google Workspace Admin Help – Super Admins
Google Cloud Account with Project Creator Permissions
Ensure your Google Cloud account has the Project Creator role.
For more details on creating and managing projects, visit:
Google Cloud Resource Manager – Creating Projects
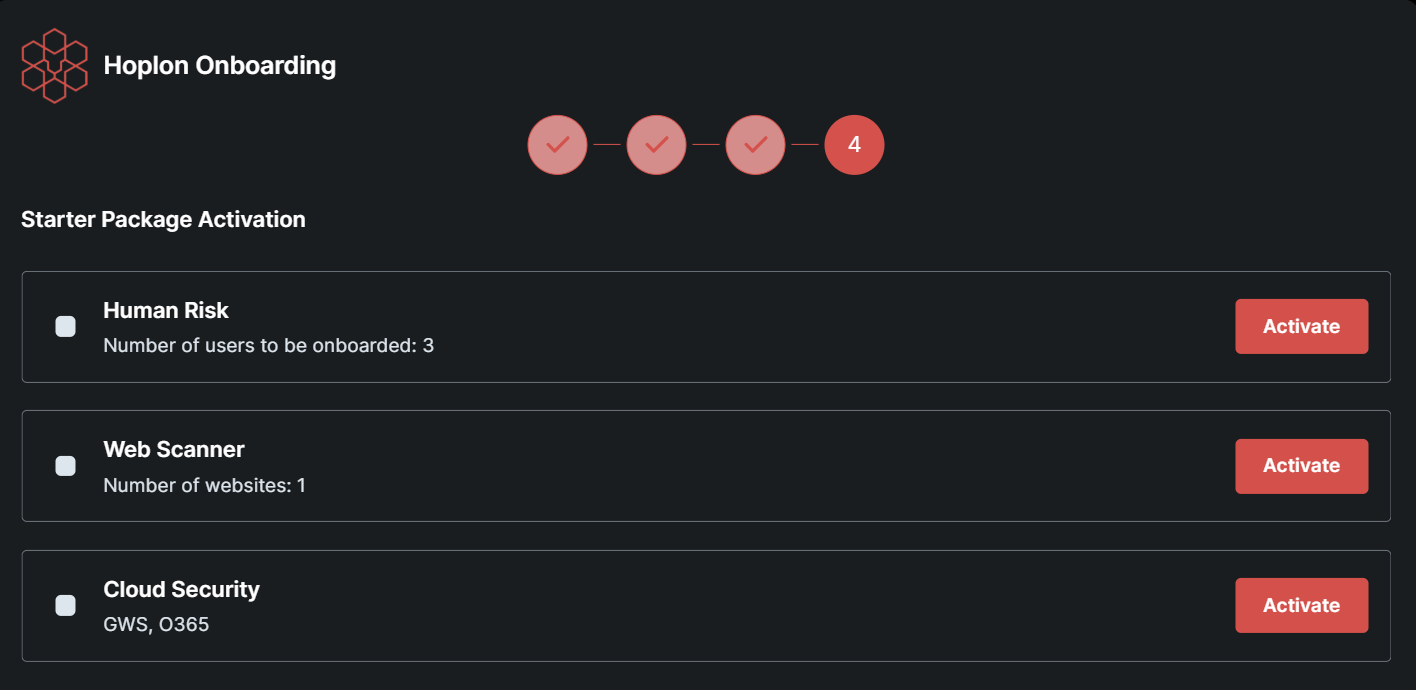
Where to Start:
After reaching the Cloud Security activation section on your Hoplon Platform:
Select Activate:
Click Activate button which is adjacent to “Cloud Security” to begin the process.
Initiate Activation for Both Platforms:
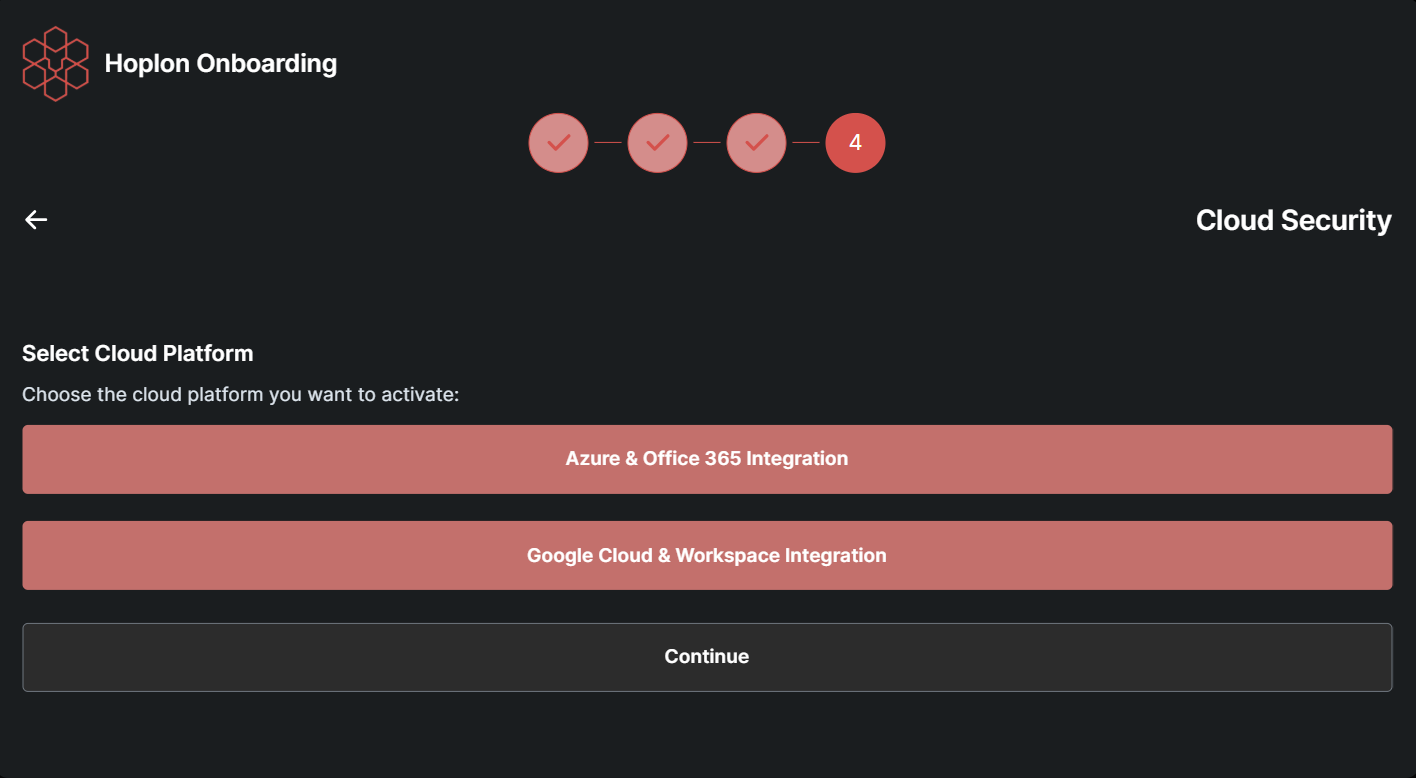
Click on Google Cloud & Workspace Integration.
Verify Prerequisites:
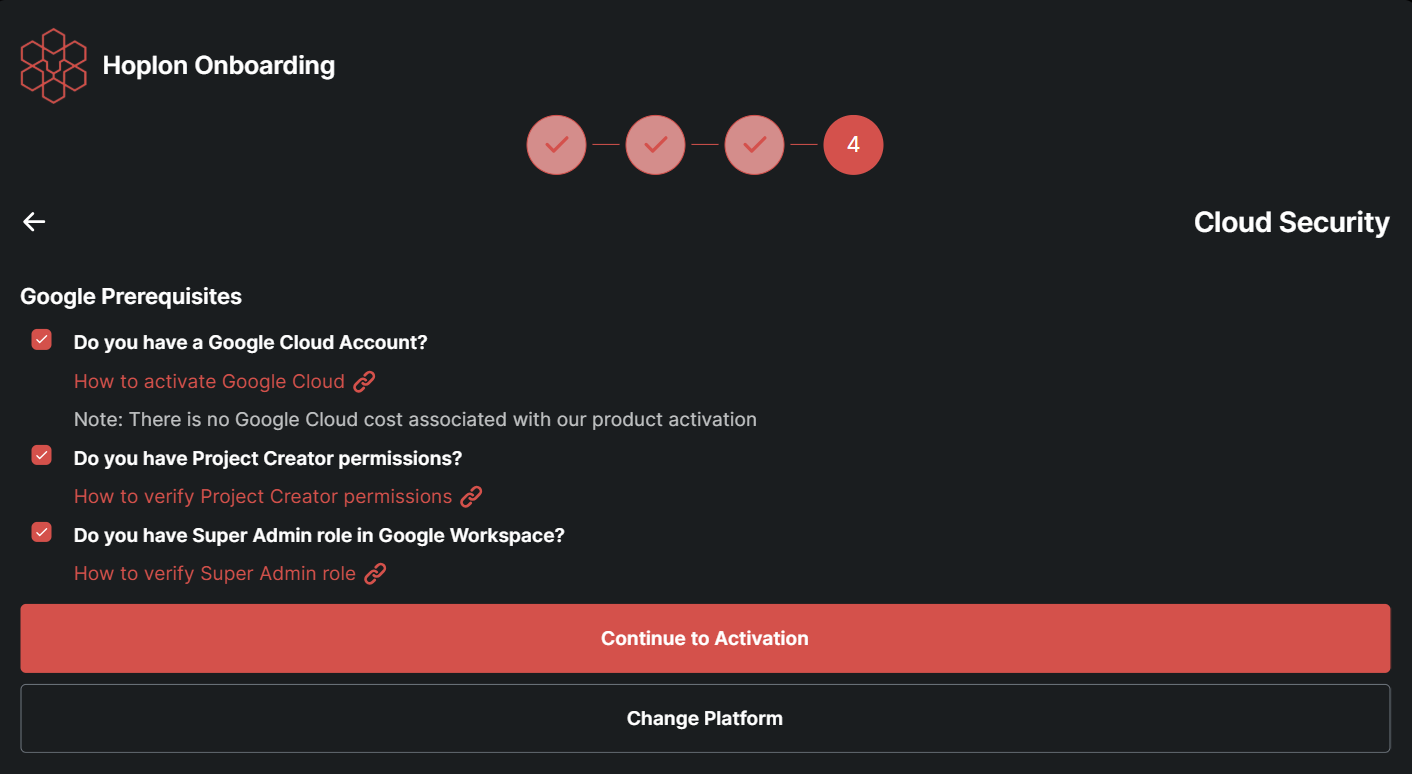
Ensure that all prerequisites (e.g., your Super Admin status and Google Cloud permissions) are complete. Then, click Continue Activation.
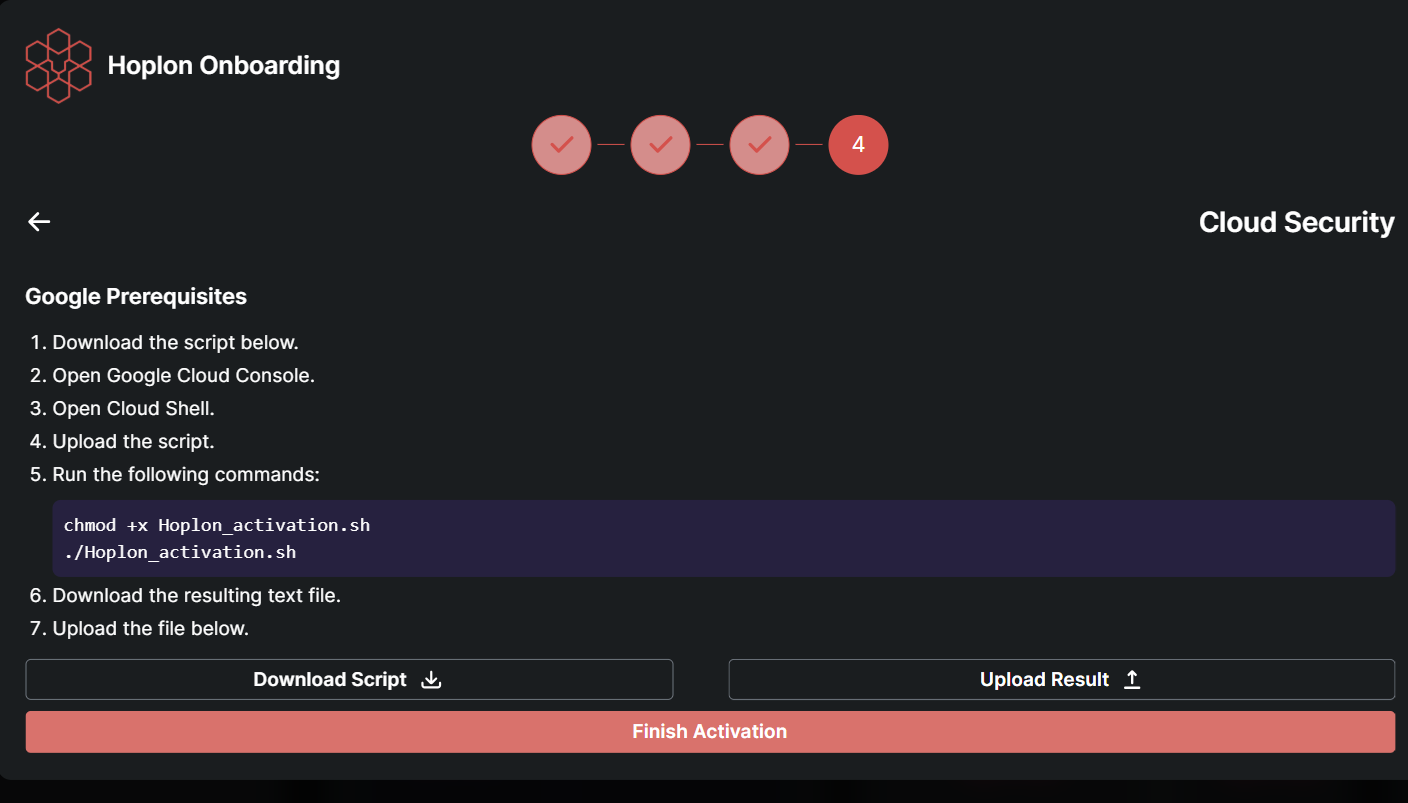
Download the Script:

Once the activation process continues, click Download Script to save the setup file to your computer.
Prepare to Run the Script:
Open the downloaded script and run it using the provided command. (Be sure to replace the filename in the command if necessary, according to the actual script name you downloaded.)
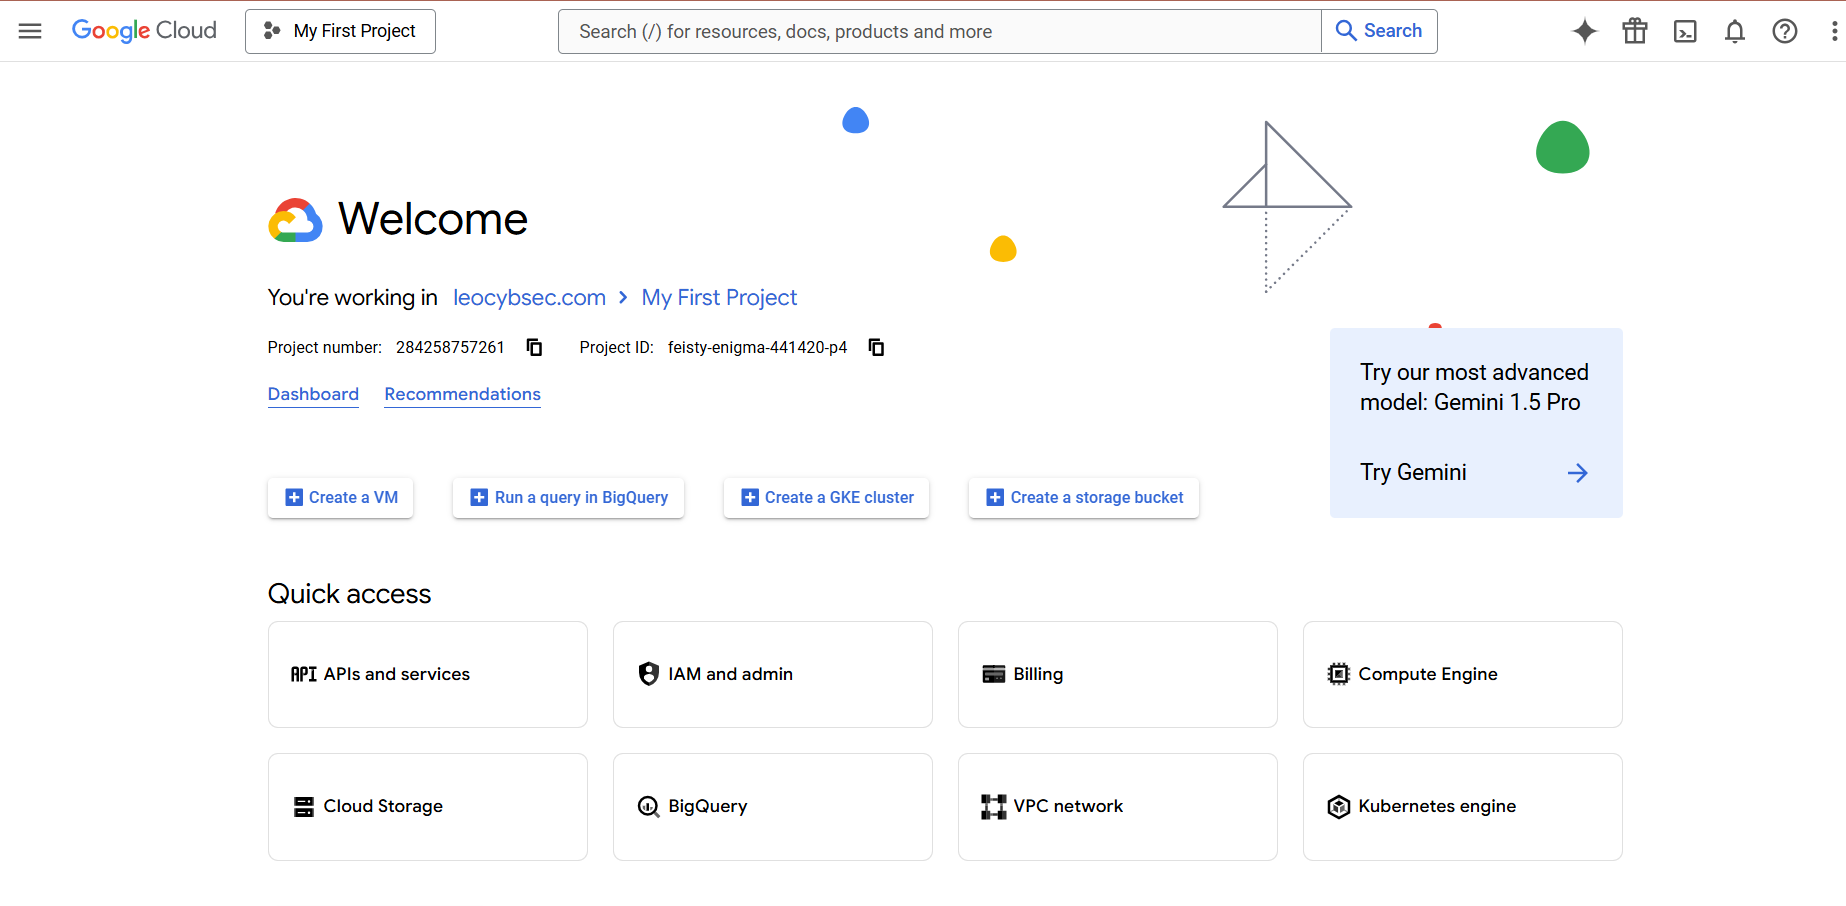
Open the Google Cloud Console:
In your web browser, go to the Google Cloud Console.
Sign in:
Use your Google account credentials (ensure you have the correct permissions).
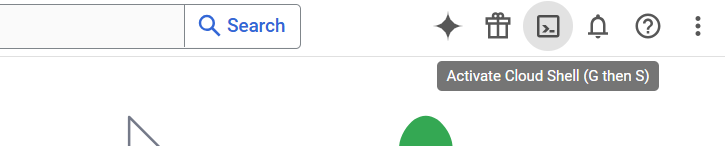
Activate Cloud Shell:
In the Google Cloud Console, click the Activate Cloud Shell button (usually found at the top right).
Result:
A small command window will appear at the bottom of your screen.
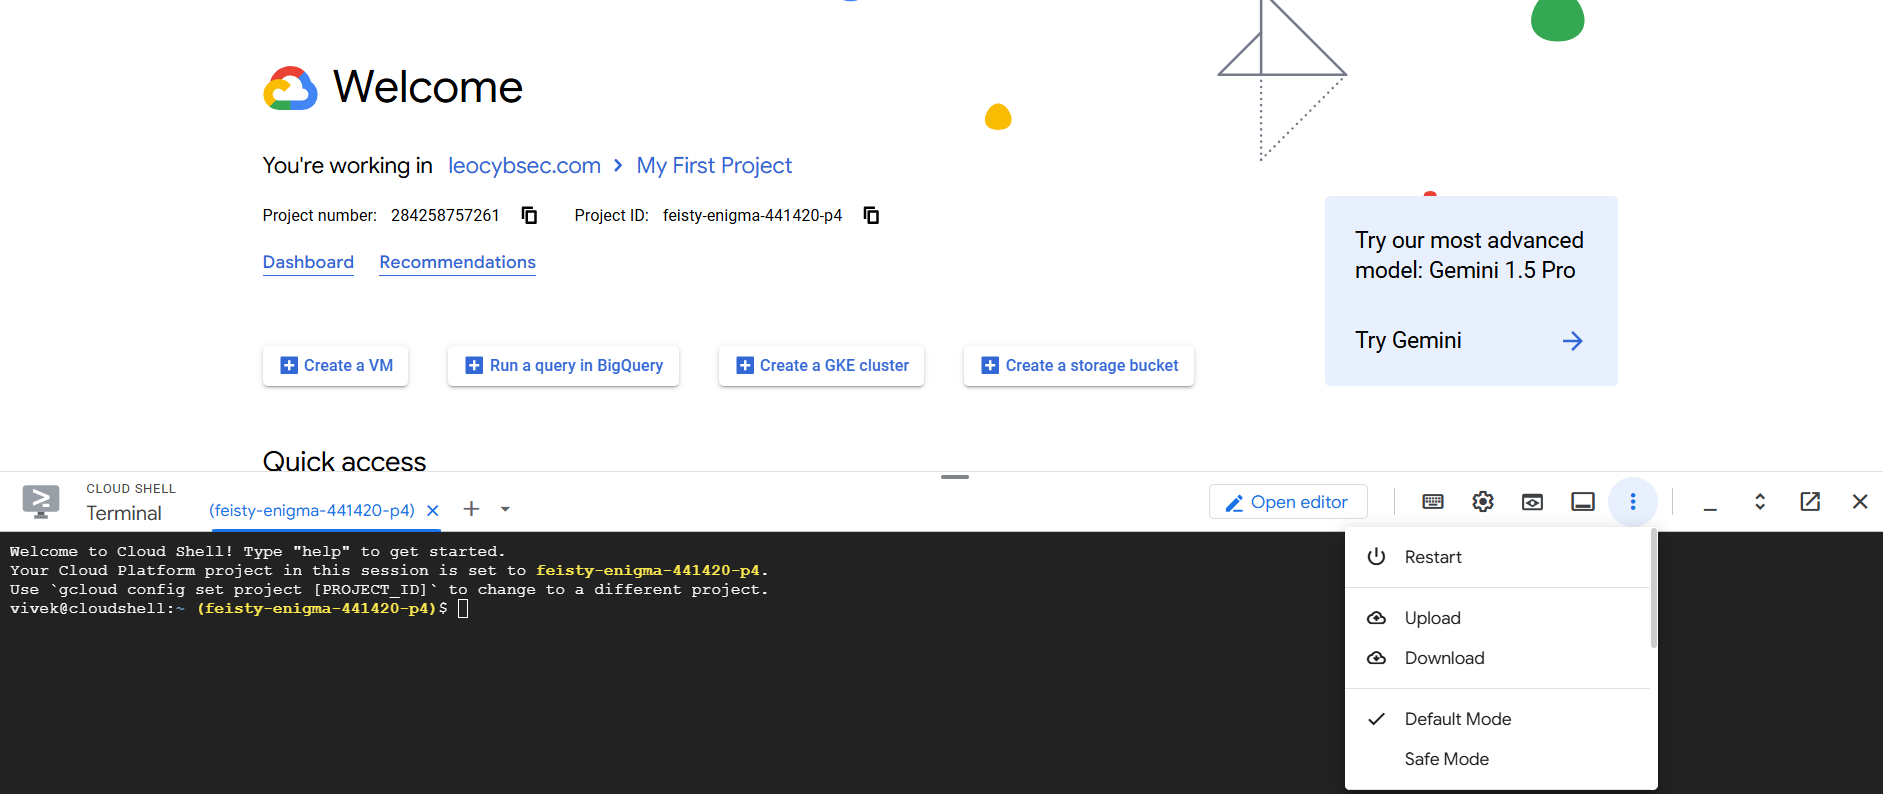
How to Upload:
In the Cloud Shell, click on the three vertical dots (menu button) at the top-right corner.
What to Do:
Select Upload
Navigate to the file you downloaded in Step 1.
Choose the script file (e.g., leocybsec-gcp-org-key-setup-script.sh) and upload it.
Make the Script Executable:
In the Cloud Shell, type the following command and press Enter:
chmod +x leocybsec-gcp-org-key-setup-script.sh Explanation:
This command tells the system that the file can be run.
Execute the Script:
In the Cloud Shell, run the script by typing:
./leocybsec-gcp-org-key-setup-script.sh Follow Prompts:
Follow the on-screen instructions. The script will prompt you to enter your Google account credentials – simply follow the prompts.
Key File Generation:
When the script finishes, it will create a key file named leocybsecScannerKey.json and display a Client ID on the screen.
Action Required:
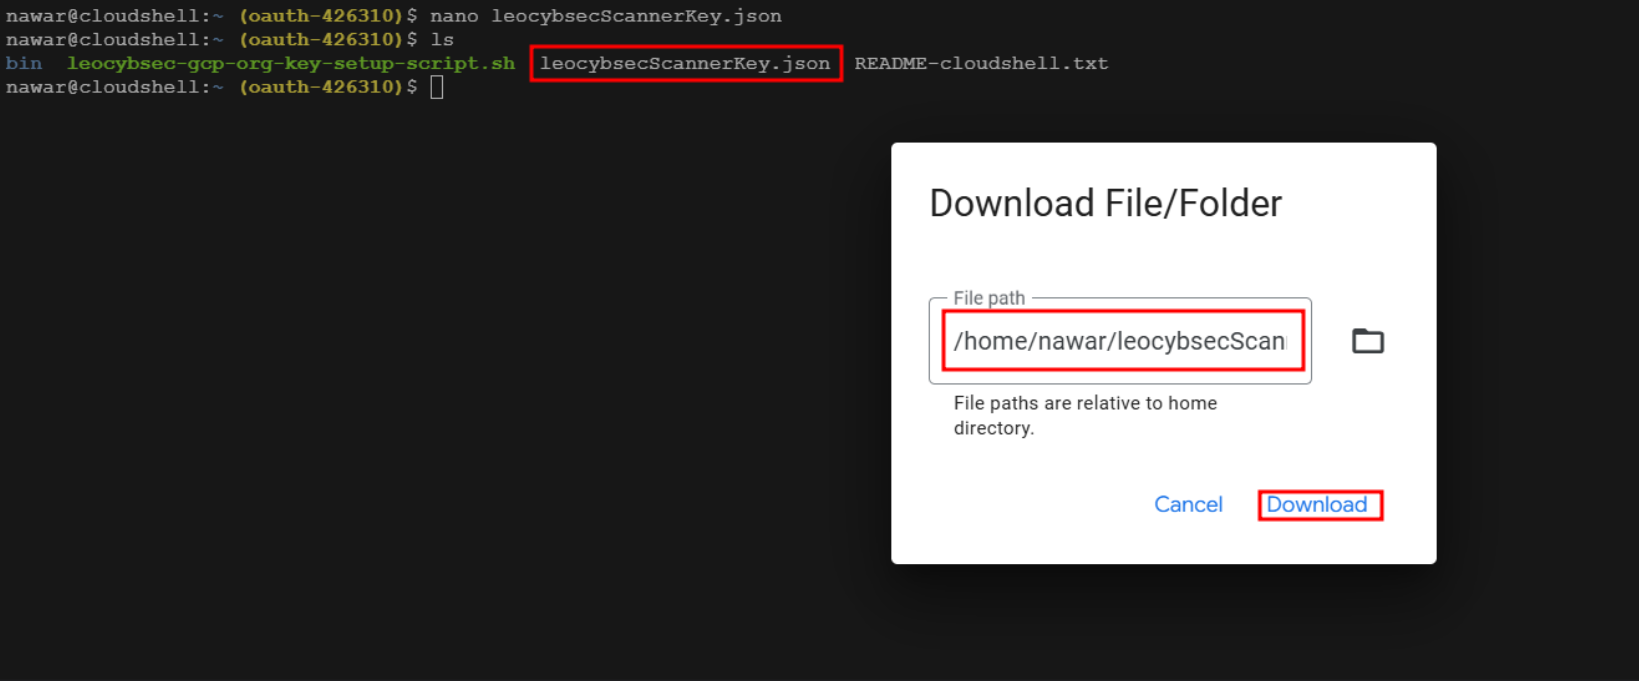
Download Confirmation: Ensure that the leocybsecScannerKey.json file is successfully downloaded to your computer.
Copy the Client ID: Note and copy the displayed Client ID, as you'll need it in the subsequent steps.
Log In to Google Admin Console:
Open the Google Admin Console and sign in using your Super Admin account.
Navigate to Delegation Settings:
Go to:
Security > Access and Data Control > API Controls > Manage Domain-Wide Delegation
Add New Delegation:
Click Add new.
Enter Details:
Client ID: Paste the Client ID you copied earlier.
OAuth Scopes: In the OAuth Scopes field, paste the following list (each scope separated by a comma):
https://www.googleapis.com/auth/drive.activity.readonly, https://www.googleapis.com/auth/drive.metadata.readonly, https://www.googleapis.com/auth/admin.reports.audit.readonly, https://www.googleapis.com/auth/admin.reports.usage.readonly, https://www.googleapis.com/auth/drive.readonly, https://www.googleapis.com/auth/admin.directory.user.readonly, https://www.googleapis.com/auth/drive.appdata, https://www.googleapis.com/auth/drive.apps.readonly, https://www.googleapis.com/auth/drive, https://www.googleapis.com/auth/spreadsheets.readonly, https://www.googleapis.com/auth/admin.directory.user.security Finalize:
Click Authorize to complete this step.
Access the Upload Section:
Return to your Hoplon Platform where the Cloud Security Module activation is in progress.
Upload the JSON File:
Click on Upload Results.
Navigate to the location on your computer where the leocybsecScannerKey.json file was downloaded.
Select the JSON file and upload it.
Finish Activation:
After the file uploads successfully, click Finish Activation. Once the process completes, the platform will automatically redirect you to the package activation page.
Note:
If you encounter any difficulties during the upload or activation process, please contact support for assistance.
